Planning Classic - Generate Password file
This section is applicable if you have a Planning Classic application and either Auto Import or enable direct deployment (for the planning application). Generation of a password file is required, and its location is specified in the Application Configuration Properties Tab.
To Generate a Password File
- Logon to the Planning Application Server
- Navigate to folder
D:\Oracle\Middleware\user_projects\epmsystem1\Planning\PlanningAppName - Run
PasswordEncryption.cmd <passwordFile>(specify the full path for password file)
For Example:
Start Windows Command Prompt and execute following steps to generate Password file.
- cd d:
- cd
D:\Oracle\Middleware\user_projects\epmsystem1\Planning\planningApp PasswordEncryption.cmd ew_hp_cl_pwd.txt- Enter password of App user configured in EPMWARE for the Planning Application
- Expect following result from the script:
“Password has been encrypted and written to the file ew_hp_cl_pwd.txt successfully!”
Note
- If the file path is not specified the Password File is generated at the location where this command is run.
- Planning User that is configured in EPMWARE to communicate should be granted “LCM Administrator” role else during application import error: “Failed to authorize user for LCM migrations” will be thrown.
- Ensure Application Properties for Planning Classic application for Password file EPM Instance Home are accurate.
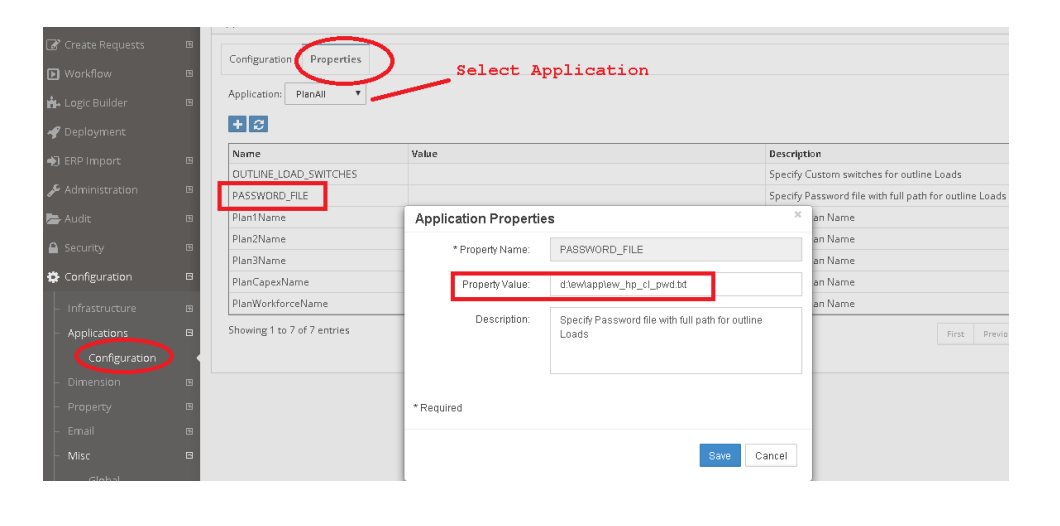
Reference Password File in EPMware
- Select application from LOV, select PASSWORD_FILE from the grid
- Right click Edit Properties to change the property value
Note
- Specify the filename with the full path in the target application parameter as shown below.